In this article we will instruct you to setup your printer to work with elegant menu’s automatic order reciept printing feature. You normally do not need to print the reciepts, but we added the feature for those who may need it.
Requirements:
- A laptop/PC running Windows, Mac or Linux (we do not support ios and android)
- A Wifi router (modem)
- An Epson thermal printer (might work on other brands as well)
- Epson TM Utility app (Install it on your phone)
👉 Note: This service is tested with Epson Tm series. We recomend using Epson printers, it may work with other brands as well but we cannot guarantee that. This will work for free and paid Elegant Menu accounts.
Step 1: connect the printer to wifi router via ethernet
The first step in setting up your thermal printer is to connect it to your WiFi network. You have two main options depending on your setup:
- Wired Connection (Ethernet Cable):
- Use an Ethernet cable to connect your printer directly to the WiFi router. This method provides a stable connection and is recommended if your printer and router are close to each other.
- Once connected, the printer should automatically detect the network and print a slip with its IP address.
- Wireless Connection (WiFi Dongle):
- If you prefer a wireless setup, you can use a compatible WiFi dongle or adapter with your thermal printer.
- Plug the dongle into the designated USB or network port on the printer.
- Follow the printer’s user manual to connect it to your WiFi network. This may involve configuring the network settings via the printer’s control panel or using a software utility on your computer.
- Once connected, the printer will usually print a slip with its IP address, confirming a successful connection.
- Please check this Link for complete guide about configuring wireless connection
- Epson TM Utility App: Install the app and follow instructions to set printer ip manually to 192.168.1.127, The print server will not work if the printer Ip is not 192.168.1.127.
👉 Note: For optimal performance, ensure that the router’s signal is strong and there are minimal obstructions between the printer and the router if using a wireless connection.
step 2: turn On the printer and check its IP
- Power on the printer. The Ethernet light will stop blinking after about 10 seconds.
- The printer should print a slip with its default IP address, which must be 192.168.1.127.
- If the IP address is different or not printed, you may need to reset the printer to its factory settings.
- If your printer’s default IP address is not 192.168.1.127, you can change it via the printer’s settings page or via Epson TM Utility app.
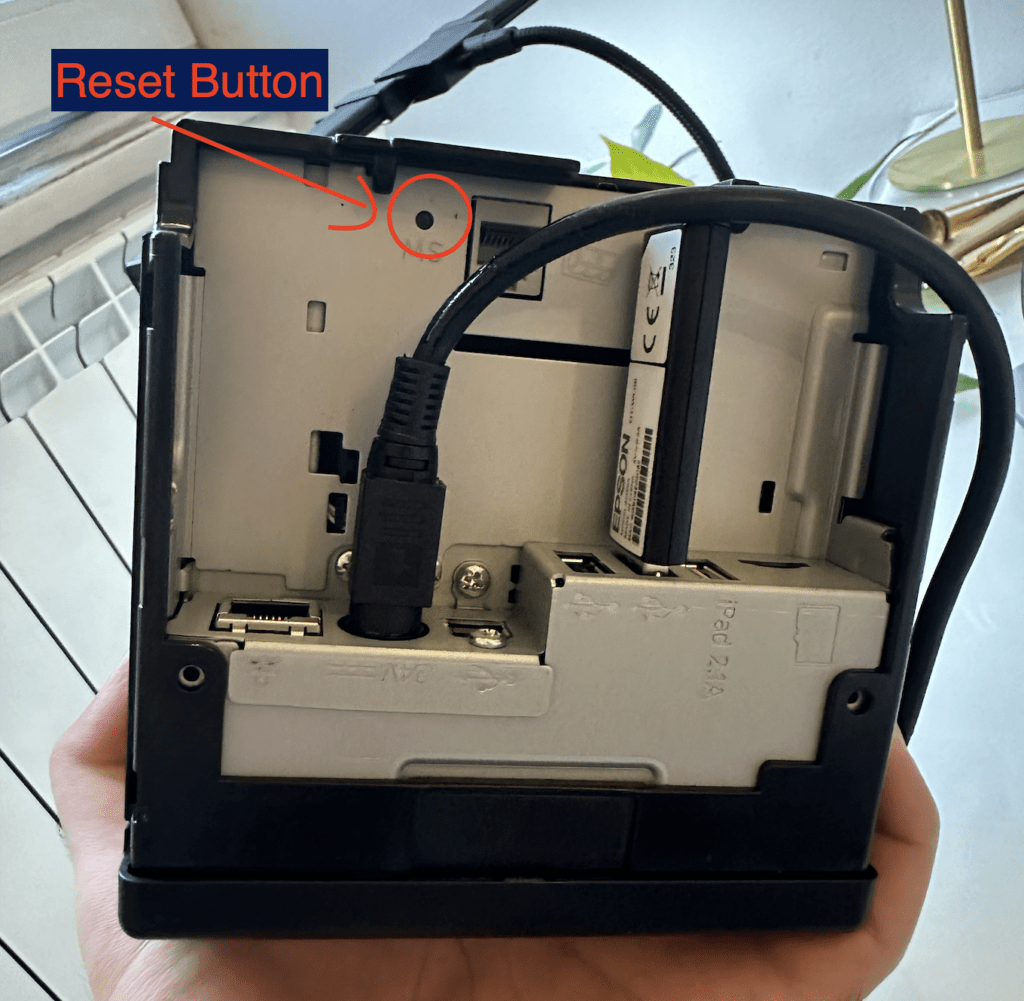
How to reset Epson thermal printer to factory settings
- Turn off the printer.
- Press and hold the Reset button for at least 5 seconds. You may use a Pen or sharp object.
- Turn the printer back on.

This will restore the printer to its default settings, including the default IP address. Use web interface which is accessible through browser address 192.168.192.168 or TM Utility to change printer IP to 192.168.1.127.
step 3: Download and run Elegant Menu Printer Server
Please download and unzip Elegant-print-server for your operating system.
After downloading, unzip the folder and double click on the executables, choose all the trust popups and proceed to run the app.
You should see a message simmilar to this, minimize the window and thats it!

Step 4: Automatic order reciept printing from your dashboard
Now login to your Elegant menu dashboard and from order section enable automatic order printing.
Then go to manage orders page and keep this browser tab open for automatic printing. If Manage orders window is not open, orders will not print automatically!

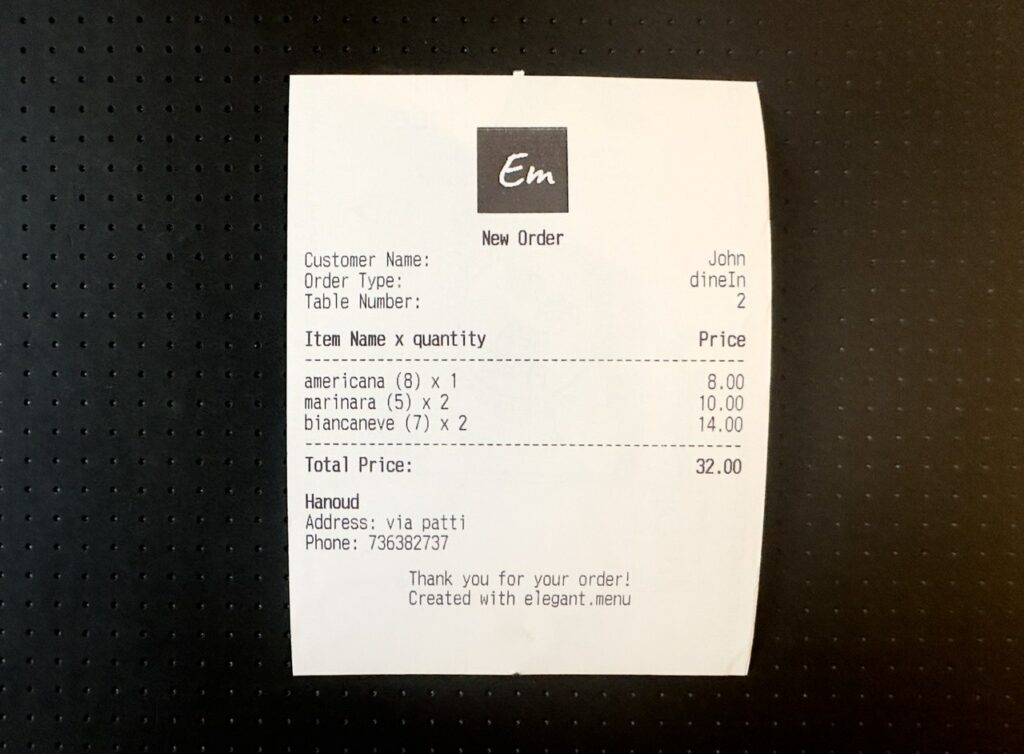
This is an example of an order reciept:

We can customize this payment slip with your logo and requirements. This service is available for our Premium subscribers. Please contact us to learn more.
Don’t have an Elegant Menu account yet? Visit our sign-up page to create your free digital menu today. You may also read this article and learn how to get started with Elegant Menu. It’s quick and easy—perfect for your restaurant, hotel, or bar!
If you encounter any issues during the printer setup or automatic order reciept printing, feel free to share your questions or feedback in the comments section below. We’re here to help! Thank you!
If you see an error, close the window and try one of these solutions:
- Check printer is turned on
- Check printer’s IP address (it must be 192.168.1.127)
- Check that you are connected to the same network as printer (same wifi name)
After you checked above, double click on the downloaded file again until you see the success message.
